Jam Wedding Ideas
If there's one fruity preserve that never fails to please, it's good ol' jam. Old, young, male and female – there's hardly a person in the world that doesn't have somewhat of a soft spot for this sweet preserve. Whether you're going for a full-on vintage theme or more contemporary style wedding, jam will always be a guaranteed crowd pleaser.
Home-made jam is of course very much reminiscent of grandma's kitchen, filled with the sweet aromas of peaches, apricots and strawberries bubbling away in a sugary syrup on the wood stove. What's more, with a little help from that same grandmother, you can easily whip up a batch of your very own home-made jam. Not only will guests appreciate the effort, it also makes a very budget-friendly guest favour.
Once your jam is made and bottled, here's what you can do with it:
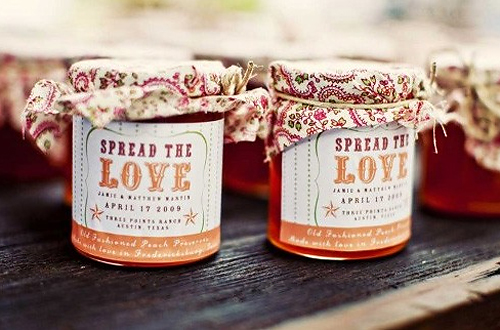
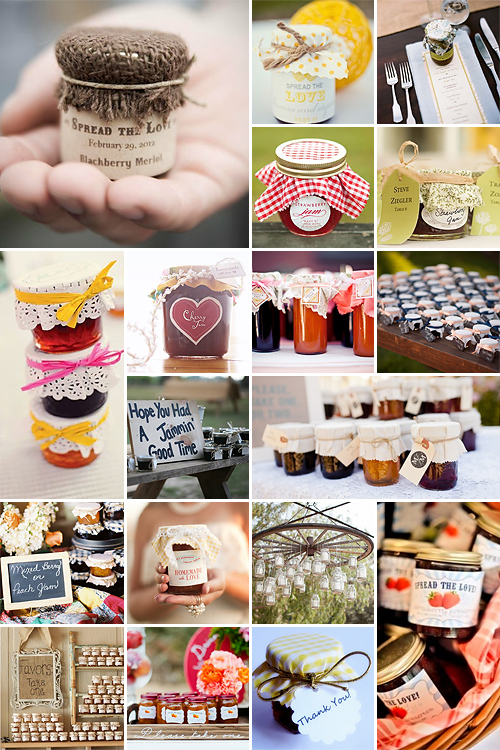
- There's no better way to “spread the love” than sending guests home with jars of home-made jam as guest favours
- Label each jar with your wedding date and the guest's name – a personal touch that turns your favour into a place card.
- Make two or three different kinds of jam to ensure that hubby and wife don't go home with the same variant.
- Instead of canapés, serve a variety of freshly baked breads with home-made jam and cheese.
- Alternatively, make a big bonfire and provide bowls of bread dough and sticks for guests to make their very own “stokbrood”. This goes amazingly well with home-made jam and is the ideal way to keep guests occupied while you're off snapping wedding pictures.
- Continue along the vintage path by serving a variety of jam tartlets, or “hertzoggies”, for dessert.
- Ask your cake designer to add a little jam to your wedding cake, by either adding it to the actual recipe or dripping and swirling the sweet stuff over the cake itself.
- Bake a batch of scones and pack a tiny day-after breakfast basket for each guests, consisting of two scones, a tiny jar of jam and a mini butter or handful of strawberries.
- Add an extra vintage touch to the jars by placing a little “hat” over the lids. This is as simple as cutting a round piece of fabric – slightly bigger than the lid of the jar – and placing it over the lid by means of a rubber band or ribbon to keep it in place.


![Mrs [Surname] Wedding Year T-Shirt](https://www.celebration.co.za/shop/wp-content/uploads/2019/03/mrs-surname-weddingyear-t-shirt.jpg)